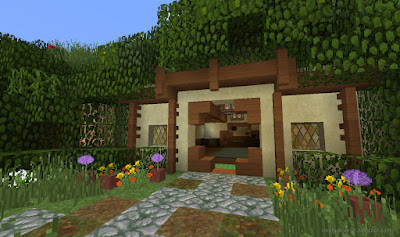
Superflat World
When I decided to do a Hobbiton build I began by spending a
couple hours flying around random worlds looking for an environment to build
upon. That wasn't as easy as I had hoped. In the end I saw there was a
"Superflat World" option. I guess I'll be building everything myself,
block by block, from scratch.
Bag End: 1.0 -
Planning and Layout
For me when I think of Hobbiton I think of Bag End, so
that is where I decided to start.
Weta Workshop (https://www.wetanz.com/) has many great props
and one happened to be a nice floor plan of Bag End. While this piece is sold
out I was able to grab a screen shot to use as a reference moving forward.
My first go at it was a literal copy of the floor plan in Minecraft. Things were looking ok but the lack of straight walls was a little
too much for me.
So I decided to square up the plan over a grid and try
again. My mind was put at ease.
With the plan set it was time to start looking at the elevation. I figured the key dimension here might as well be based off of that infamous round green door.
To make sure this scale worked inside and out I next went to the Entrance Hall and Parlour.
This is working out better than I had hoped.
Minecraft slope:
Right experience
Knowing that I could get Bag End to work I started to think through the environment next. I needed some reference material and was
able to find the Weta Forum (currently called Flame of Udun) where a special
post was created "Hobbiton Chronicles" (http://flameofudun.net/forum/general/4043-hobbiton-chronicles).
It was only a couple posts old but the amount of content that would pop up over
the next 10 months would be incredibly helpful. Go ahead and save the link for viewing later. I'll wait.
One of the key pieces I received from the forum was some
amazing maps of Hobbiton (theatrical version) that were passed down from a
"Flamer" by the handle lotrscenerybuilder (LSB) through the hands of another
"Flamer" known as Minuialwen.
There were many challenges in converting these maps into a
properly scaled Minecraft world. I began by creating 4 objectives.
- Some Hobbit Smials (occasionally referred to as holes) were not built full scale on the site. My objective was to build all Smials to scale and make them so you could enter each one and walk around inside.
- The site at The Hill was fairly steep. I decided to soften some of these grades to allow one to walk around in the Minecraft environment with a little more ease.
- While walking around the New Zealand site gives you one experience, you have to understand that from a Hobbit's perspective (a little lower) Hobbiton would have been perceived a little larger. Maybe?
- I felt that The Water / Bywater Pool was a little undersized and wanted to enlarge that a bit.
An Unexpected Error /
Delved Too Deep / Superflat World Sucks
At this point I'm feeling very confident and think that I have a
good handle on the build scale. Now to start terraforming!
Once I calculated the height of the "The Hill" I
started the epic dig down the hill side from Bag End.... for about 2 seconds.
Then I fell into an abyss as one does.
So, evidently the Superflat world is only 4 layers thick.
(1) layer of bedrock, (2) layers of dirt, and (1) layer of grass. I don't know
what I was expecting but it wasn't this. One lesson I won't soon forget.
“Not all those who
wander are lost.”
Wow, out of the gate I've already had a huge setback! But I
knew where I needed to go and just had to wander about for a while longer until
I can get back on track.
Matrix + Scaffolding
While consulting the maps I began doing some site mock ups to
study the roll of the land. I identified the high and low points of Hobbiton
and counted 15 blocks from the bottom of Bywater Pool to the threshold of Bag
End. I created a 10x10 matrix across the land to help create guidelines that
corresponded with the lines I added to my maps. This helped me create a skeleton of what the final terrain would look like.
Once set it was time to 'skin' the sketleton.
Bag End: 2.0 – In a
hole in the ground (in the sky) there lived a hobbit.
OK. I just spent a considerable amount of time on the project and I'm
nearly back to square one. On the plus side I once again have some solid ground back under my feet but I am now staring at
an empty lot where Bag End needs to go. (Remember that Bag End v1.0 is about 13 blocks below me at this point where is remains even to day)
"Do not
trouble your hearts overmuch with thought of the road tonight. Maybe the paths
that you each shall tread are already laid before your feet, though you do not
see them." ~ Lady Galadriel (Tolkien)
Through some time consuming but enjoyable effort Bag End 2.0 has arrived.
I am really liking the build so far and I'll dig into the details of each room later on. For now I'll work on the next post which tackles laying out the entire realm of Hobbiton.
INDEX:
1.Preface
2.Concerning Scale
3.Finding the Limits
4.Sandyman's Mill, Green Dragon
5.Bywater Pool, Hobbiton Road, Poolside
6.Bagshot Row
7.Gandalf's Cutting, Great Smials
8.Frog Pond, Woody End
9.Bag End, Hill Lane
10.The Hill, Overhill (placeholder)
11.hobbit.Lab (placeholder)
12.Resources (placeholder)


No comments:
Post a Comment